7/2019: github made public. note: could use some better docs
how to: print, customize and
successfully use a 3d printed bit for tightening "knurled nuts" on
eurorack systems. It could be modified for other systems. If you are
going to bother to print one out you might as well read on? Maybe
there is something helpful down there...
Why?
The bit may be an improvement over existing tools for certain applications, the main reason being it
is designed to be used with a power tool. If you are producing
Eurorack modules at any volume by hand, this will reduce the duration of
your life spent tightening nuts.
It is usually a bad idea to tighten a nut with a power tool because it is
easy to over-tighten. You can destroy the nut, damage the faceplate, or destroy the
threads on the the 3.5mm jack.
However, when using the appropriate low power driver, the risk for damage is very low.
Risk of slipping and scratching a faceplate is minimized
by the bit itself. It is
made of plastic and not metal.
Additionally, if over-tightening does occur, this bit takes damage
instead of your equipment.
Because the bit does experience wear, I have attempted to design it in a way that
extends the life as it is used. As one layer wears away, the layer above
continues to provides friction.
Other People's Designs
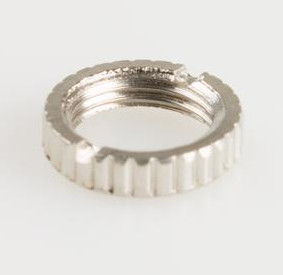
Most designs rely on two little "slots" or "notches" on the
knurled nut.
A tool slides into these "slots", the same way a screwdriver slides into
a horizontal ("flathead") or cross ("Phillips") slot on a screw. Sometimes it is hard
to line up with these "slots". You can also slip out of the notches if you
are not holding the tool perpendicular enough. To prevent this, some tools also
provide a center alignment pin which goes into the 3.5mm jack itself.
I'm faster spinning this by hand. It just so happens that when the
nut reaches the end of travel, the LED will dim. This is useful as an
indicator to when the nut is sufficiently torqued.
Suprisingly well made. It is obvious a fair amount of thought went
into the design. Torque is easily adjusted. Creative packaging uses
case as a charging stand.
Note: these are Amazon affiliate links!
More Details About The Design
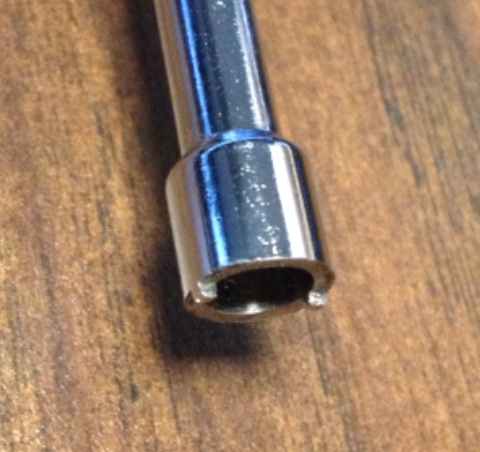
Initially, I designed a bit to also fit in these "slots". However, these
were quickly destroyed when using a power tool... and the whole point of
this design is to be able to use it with a power tool. You will find
many people recommending not to do this in various places on the internet.
We have been successfully using this bit with a power tool in production.
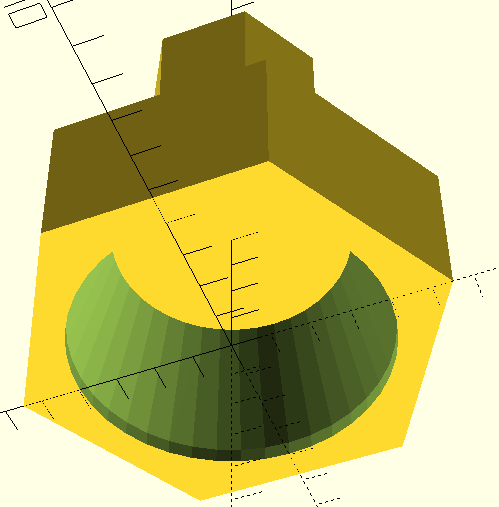
Instead of utilizing the slots on a knurled nut, this bit is designed to
use the force of friction. You can see in the image on the left that the
bit has a "cone-shaped"
cutout. As you push down on the knurled nut, this cone
squeezes down. The concept is that simple.
Because the bit does not use the slots of the knurled nut, it is easier to
align. It fits at any rotation. You don't need to be careful about slipping
out of the slots. If you try to over-torque the nut, the bit simply
spins rather because it is not locked into place (via the slots).
This drastically reduces the chance for destroying your jacks with too much
torque. The bit takes damage rather than the nut.
The risk of damage to your Eurorack faceplate is lessened as well. Because
the bit is made of plastic (I am printing with PLA), you don't have as much
risk of scratching the faceplate as you would with a metal driver.
In this video, the nuts are torqued slightly past hand-tightened strength.
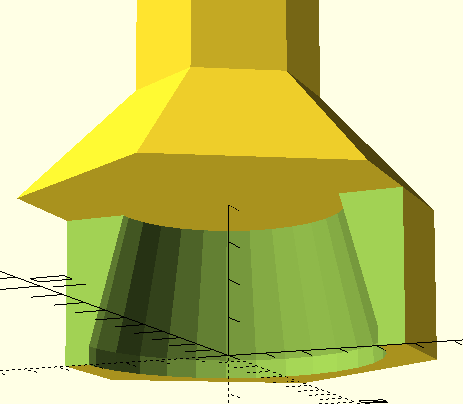
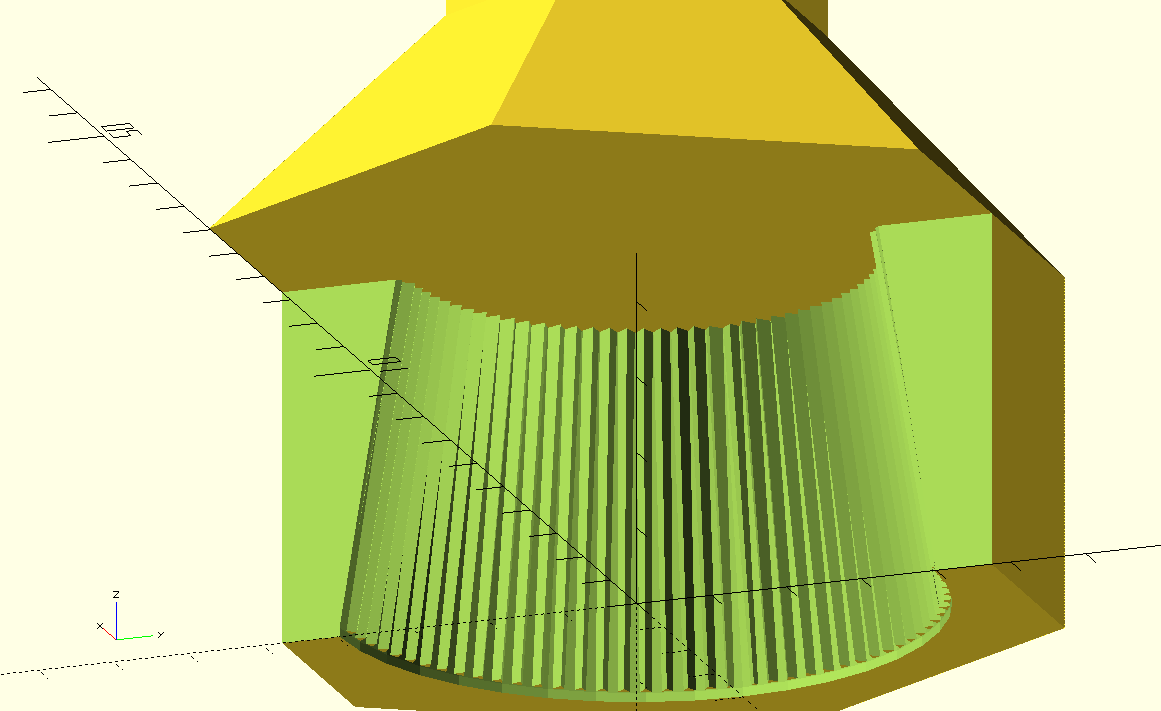
Knurled... squared?
After some weeks of testing... I have made some improvements to the driver
to reduce the rate at which it wears. I knurled the inside of
the bit. I added some "teeth". To do this, I
created a cylinder. Then, in a "for" loop subtracted a triangle at different
rotations.
In other words, imagine you're making
a pizza. Then, you cut a big triangle centered at the middle.
With your knife, you cut almost
to the edges.
Then do that again, but first, rotate your triangle 10 degrees.
If you're rotating by 10 degrees, to go all the way around you'll need to
make (360 degrees / 10 degrees = 36 - 1) 35(?) triangle cutouts.
If you're looking at the pizza from outside in... you'll see a bunch of
a bunch of ridges poking out from the inside (the tops of all of the
triangles).
The rate at which the driver wears is hard to quantify. It will
be based on these variables: